JdbcTemplate配置Druid多数据源的核心在于创建JdbcTemplate时候为其分配不同的数据源,然后在需要访问不同数据库的时候使用对应的JdbcTemplate即可。这里介绍在Spring Boot中基于Oracle和Mysql配置Druid多数据源。
引入依赖
先根据https://mrbird.cc/%E5%BC%80%E5%90%AFSpring-Boot.html开启一个最简单的Spring Boot应用,然后引入如下依赖:
1 | <dependency> |
多数据源配置
接着在Spring Boot配置文件application.yml中配置多数据源:
1 | server: |
然后创建一个多数据源配置类,根据application.yml分别配置一个Mysql和Oracle的数据源,并且将这两个数据源注入到两个不同的JdbcTemplate中:
1 |
|
上述代码根据application.yml创建了mysqldatasource和oracledatasource数据源,其中mysqldatasource用@Primary标注为主数据源,接着根据这两个数据源创建了mysqlJdbcTemplate和oracleJdbcTemplate。
@Primary标志这个Bean如果在多个同类Bean候选时,该Bean优先被考虑。多数据源配置的时候,必须要有一个主数据源,用@Primary标志该Bean。
数据源创建完毕,接下来开始进行测试代码编写。
测试
首先往Mysql和Oracle中创建测试表,并插入一些测试数据:
Mysql:
1 | DROP TABLE IF EXISTS `student`; |
Oracle:
1 | DROP TABLE "SCOTT"."STUDENT"; |
接着创建两个Dao及其实现类,分别用于从Mysql和Oracle中获取数据:
MysqlStudentDao接口:
1 | public interface MysqlStudentDao { |
MysqlStudentDao实现;
1 |
|
可看到,在MysqlStudentDaoImp中注入的是mysqlJdbcTemplate。
OracleStudentDao接口:
1 | public interface OracleStudentDao { |
OracleStudentDao实现:
1 |
|
在OracleStudentDaoImp中注入的是oracleJdbcTemplate。
随后编写Service层:
StudentService接口:
1 | public interface StudentService { |
StudentService实现:
1 | ("studentService") |
最后编写一个Controller:
1 |
|
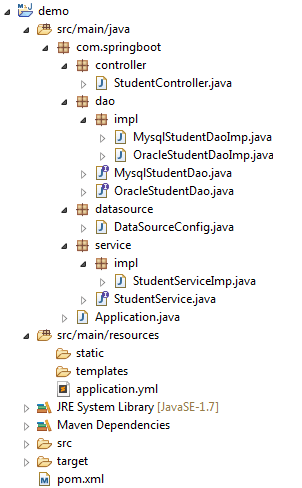
最终项目目录如下图所示:

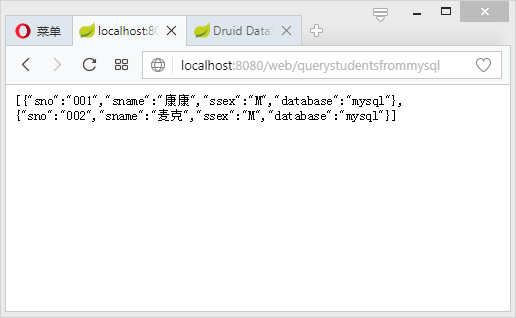
启动项目,访问:http://localhost:8080/web/querystudentsfrommysql:

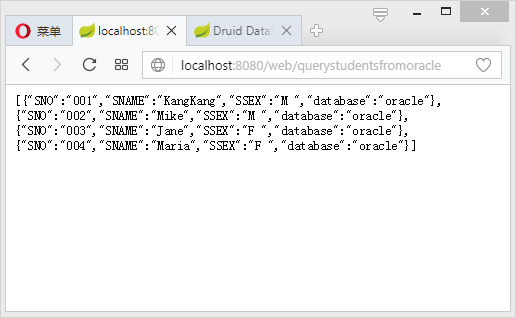
http://localhost:8080/web/querystudentsfromoracle:


